Tag Archives: Vegetarian

Eggplant Relish Pasta Sauce/Crostini

28 Aug

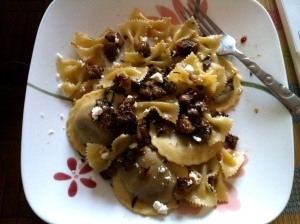
Leftover pasta tossed with eggplant relish and feta

Anyone who knows me is aware of my love of purple, so it should come as no surprise that when I saw bright purple mini-eggplants at the farmers market, I had to buy a couple.  Unfortunately, I didn’t have a plan for what I would actually do with them, so a week or so went by before I got around to finding a recipe to use them in.  Luckily the eggplants were still usable, and I found a very yummy-sounding recipe in Emeril Lagasse’s “Farm to Fork” for Eggplant Relish Crostini.  I had some miscellaneous pasta leftover, so decided to use this relish type thing as a topping/sauce for pasta instead of on bread.  There are lots of rumors about eggplant being hard to get right as it can remain bitter when cooked, but this was pretty simple, and absolutely delicious.  The eggplant shrinks down a lot, so it doesn’t make a huge amount, and next time I will definitely make more and buy some bread to make the crostini.  I used sundried tomatoes instead of roasted red peppers because I had those in my fridge, but the tomato flavor really came through and were one of the highlights of the dish, so I would use them again instead of red peppers.  This does have a quite long list of ingredients, but most of the ingredients are fridge/pantry staples anyway, so this could be an easy weeknight dinner or a great party appetizer served on toasted bread.

Eggplant Relish Crostini/Pasta Sauce
Adapted from Emeril Lagasse’s Farm to Fork
Makes about 3 1/2 cups relish

Equipment: Knife, peeler, frying pan, wooden spoon,

Ingredients
1/4 cup plus 2 tablespoons extra virgin olive oil
3 pounds eggplant (about 2 large), peeled and cut into 1/2 inch cubes
1 1/4 teaspoons salt
1/3 cup sundried tomatoes stored in olive oil (about 3 from a jar)
1 1/2 tablespoons basil leaves, finely chopped
1 1/2 tablespoons red wine vinegar
2 tablespoons finely chopped nonpareil capers
2 teaspoons balsamic vinegar
1/2 teaspoon crushed red pepper/red pepper flakes
Crumbled feta cheese for garnish
French bread brushed with olive oil and toasted (for crostini)

Heat 2 tablespoons olive oil in a large frying pan or skillet over medium-high heat.  Add half of the cubed eggplant and sprinkle with 1/2 teaspoon of salt.  Cook, stirring often, until eggplant is tender and caramelized, about 8-10 minutes. Remove to a bowl and repeat with the remaining eggplant.  Set eggplant aside until cooled to room temperature.

Add all of the remaining ingredients to the cooled eggplant (except feta and bread, if using), and stir gently to combine.  Taste and adjust seasoning if needed.  Set relish aside for at least 30 minutes to allow flavors to mingle.  To serve, toss with pasta and top with crumbled feta, or serve on toasted rounds of bread drizzled with olive oil and topped with feta.
Corn Risotto and Stuffed Risotto Balls

23 Jul

Fried risotto balls!

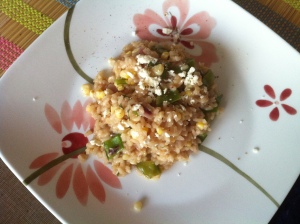
I have been seeing delicious corn recipes all over the place recently- charred corn salsa, corn tacos, grilled corn with feta, but yet when I impulsively bought two ears of corn at the farmers market I was at a loss for what to do with them. I decided to make risotto, and threw in some snow peas for good measure.  The fresh corn goes well with creamy risotto, and both the corn and the snow peas add a crunch to the finished dish.  In addition to the Parmesan that goes into pretty much any risotto, I crumbled feta in right at the end and sprinkled some on top of the risotto.  It was a delicious and filling summery dish, and (bonus!) I was able to make fried and stuffed risotto balls with the copious leftovers.

Yum corn risotto

Since risotto is a dish that needs to be made in large amounts I am always able to make at least three meals out of a batch, but this time I decided to play around and make risotto balls stuffed with mozzarella and fried.  The result was arguably even better than the risotto was when I first made it.  The cold risotto is mixed with breadcrumbs, egg, and more herbs, then a cube of mozzarella or other melty cheese is placed in the middle of a golf-ball sized risotto ball, and they are rolled in more breadcrumbs and fried to golden brown perfection.  These would make a great appetizer or starter at a party, but for me, several of them made an extremely satisfying dinner.

Fresh Corn and Snap Pea Risotto
Serves 6

Ingredients
6 cups chicken broth
1 bay leaf
3 tablespoons olive oil
1 medium onion, finely diced
1 1/2 cup arborio rice
1/2 cup dry white wine
1 cup fresh corn kernels (from 2-3 ears of corn)
5 oz snow peas, chopped
1/2 cup freshly grated Parmesan
1/2 cup crumbled Feta chees
2 tablespoons unsalted butter
2 tablespoons fresh basil leaves, chopped
Salt and pepper to taste

After chopping the vegetables, bring the chicken stock and bay leaf to a simmer in a medium saucepan.  In a large pan heat the olive oil over medium-high heat. Add the onions to the oil and sautee for 2-3 minutes, until softened.  Next add the rice and cook until opaque, about 3 minutes.  Add wine and cook until absorbed, another minute or so.  Then begin adding the stock, 1 cup at a time.  Add each cup of stock and cook over medium heat until absorbed, stirring frequently.  When the stock is absorbed into the rice add the next cup, and continue until all of the stock is gone and risotto is cooked, about 25 minutes.  Stir in the Parmesan, butter, basil, and season with salt and pepper to taste.  Crumble the feta into the risotto and mix in, then sprinkle plates with more feta if desired.

Stuffed Risotto Balls
Adapted from Giada de Laurentis’ Everyday Italian

Ingredients
Serves 4-6 (I assume as an appetizer, as I ate all of mine.)

2 cups cooked and cooled risotto
1 1/2 cup seasoned breadcrumbs
1/2 cup freshly grated Parmesan
1/4 cup fresh basil leaves, chopped
2 eggs, beaten
4 ounces fresh mozzarella, diced into 1/2 inch cubes
Vegetable oil for frying

Put 1 cup of breadcrumbs in a shallow dish.  In a bowl combine 1/2 cup of the breadcrumbs, the risotto, Parmesan, basil, and eggs.  Mix to combine, and then begin to form the balls.  With damp hands take about 2 tablespoons of the risotto mixture and shape into golf-ball sized balls.  Make an indent in the center of the risotto ball and add a cube of mozzarella, then cover the whole.  Roll the risotto balls into the breadcrumbs to coat. In a large saucepan, add about an inch of vegetable oil.  Heat over medium-high heat until about 350 degrees- to test without a thermometer fry a piece of bread in the oil, it should brown in about 2 minutes.  In batches, fry the rice balls, turning occasionally, until golden brown- about 4-5 minutes.  Take out of the oil and drain on paper towels before serving.

Homemade Pico de Gallo and Guacamole

8 Jul

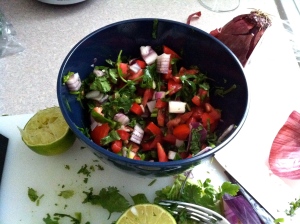
Yum Pico!

This post is well past due, as Mexican food is one of my favorite cuisines (the margaritas may have something to do with this), and guacamole is my favorite Mexican condiment.  I first made this for a barbecue a few weeks ago, and made it again for camping this past weekend.  Although fresh guacamole really doesn’t keep more than 24 hours, it worked well for camping, as I made the pico de gallo and then brought the whole avocados, so all we had to do campfire-side was cut and mash up the avocados and mix the whole thing together.  Some of our group was napping in our tent during the guacamole making/eating, and we only very half-hardheartedly yelled down the path to tell them about it.  Hey, no one wants to share guacamole.  It’s not like they starved, I promise- camping meals included lamb burgers, greek salad, bbq chicken, spicy sausages, and chocolate chip/walnut/raisin cookies.  Clearly we don’t mess around when it comes to food, even if it does have to be cooked over a fire.

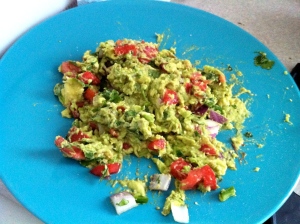
Buttery Avocado Deliciousness

To make the pico and guac, you just have to chop up some vegetables and herbs, season with lime and salt, and mash with very ripe avocados.  Although I am sometimes weary of lots of heat, the jalapenos do add a great extra kick to the pico, and they don’t make it overly spicy at all, especially if you take out most of the membrane and seeds.  The most important thing for both of these is to taste and adjust the seasonings at least once- our resident Cali-girl Alicia was an expert at getting the perfect lime to salt to avocado ratio, and you can be too as long as you keep adjusting the flavor until you have perfect guacamole.  Just be careful not to set the plate down unattended, this stuff goes pretty fast.

Pico de Gallo
Makes one small bowl

Ingredients
3 Roma tomatoes, diced
1/3 onion, diced
1-2 jalapenos, diced (seeded and de-membraned if you’re spice-adverse)
1/2 bunch cilantro, or to taste
Lime juice from half a lime
Salt to taste

Chop up all the ingredients and add to a medium sized bowl.  Use less cilantro if you want, just discard the stems and chop up the leaves roughly. Mix together, add lime juice and salt to taste.  Pico will keep in the fridge for a few days.

Guacamole
Serves about 4

5 whole avocados
Pico de Gallo
Lime juice from half a lime
Salt to taste

Cut the avocados in half lengthwise, and take out the pit (I use a knife to stab it and rotate, but assume no responsibility if someone chops off their hand with this method).  Scoop out all of the avocado flesh using a spoon, and place all of the avocados on a plate.  Mash with a fork, but leave chunky.  Add a pile of pico de gallo to the avocados and mix together.  Season with lime and salt to taste, and add more pico if desired.  Keeps 24 hours, covered with clingfilm in the fridge.

Mushroom and Spinach Quesadillas

23 Jun

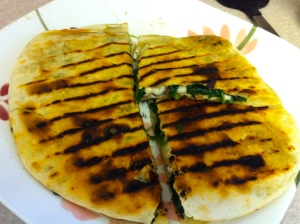
Quesadillas!!

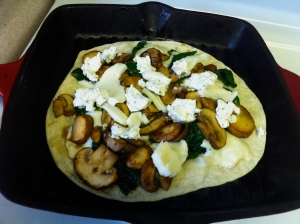
Mmmm Mexican food.  It is one of my favorite cuisines- just tonight I was planning on going to yoga, got hungry, and ate a burrito instead.  Story of my life.  These mushroom and spinach quesadillas with goat cheese are not really Mexican-y, but they do demonstrate how easy quesadillas are to make with a variety of fillings.  The main filling is mushrooms cooked with wine and spinach, combined with not one but two types of cheese. They were simple to make and assemble, and I’ve made a few more quesadillas since using leftovers such as the grilled chicken we made over the weekend.

The assembly process

I made these particular quesadillas twice in one week to use up all of the ingredients, and altered them slightly the second time to improve them.  Fontina cheese was suggested, but I didn’t want to buy yet another type of cheese when I currently have NINE different varieties in my fridge (Yes, nine. I just checked. And that doesn’t include what my roommate has. We may have a slight cheese-obsession).  I tried these with mozzarella, but I found the texture to stringy for quesadillas, so I used my cheddar/Gruyere mix the next time which was much better in terms of both texture and flavor.  I think any mildly flavored cheddar or non-soft cheese would work just fine.  When assembling the quesadillas, just make sure that the non-soft cheese is both the bottom and top layer, as this is what keeps the whole thing from falling apart.  I also added some onions and garlic to the veggies the second time around, which greatly upped the interest, and put more wine in the mushrooms.  The end result was delicious, and to continue with the Mexican theme look out for a homemade guacamole recipe in the next few days!

Mushroom and Spinach Quesadillas
Adapted from Pioneer Woman
Makes 1 quesadilla, serves 1 for dinner

Equipment: Knife, frying pan, grill pan (or reuse a large frying pan), cheese grater

Ingredients
1/2 pint cremini mushrooms, sliced
1/2 bag baby spinach
1 clove garlic
1 shallot or about 1/4 an onion, diced
3 tablespoons butter
1/4 cup wine or sherry
2 large flour tortillas
3 oz grated cheese such as Fontina or cheddar
2 oz goat cheese
Salt and pepper
Extra butter for tortillas
Salsa for serving (optional)

Melt 2 tablespoons butter in a frying pan or skillet over medium-high heat and add sliced mushrooms, garlic, and onion.  Sprinkle with salt and pepper and saute for 2 minutes, then add wine and continue cooking until the liquid has evaporated and mushrooms are brown, another 6-8 minutes.  Remove the mix from pan and set aside.

Return pan to heat and reduce heat to medium-low.  Melt 1 tablespoon butter in pan, and add the spinach.  Sprinkle with salt and pepper and cook for about 2 minutes, until spinach has just wilted. Remove and set aside.

To assemble the quesadillas, heat a grill pan (or large frying pan), over medium-high heat.  Spread some butter on the grill pan and put the first quesadilla in the pan, followed by 1/2 of the Fontina cheese, then the mushroom mix, then spinach.  Crumble some goat cheese over the spinach and finish with the rest of the Fontina.  Top with the second quesadilla and smear butter on top, then flip and cook the other side.  When both sides are golden brown with some grill marks remove and cut into four pieces with a pizza cutter or knife.  Serve with salsa if desired.

Summer Vegetable Pastas

20 Jun

Pasta with Prosciutto, Snap Peas, Mint and Cream

Taking a break from the plethora of potluck recipes (don’t worry, they will be back- I made amazing grilled ricotta chicken and homemade guacamole for our BBQ this weekend), I thought it would be nice to showcase some summery pasta dishes, using the fresh spring vegetables that are miraculously avaliable everywhere now.  Plus, clearly I can’t go a week without making some kind of pasta concoction, and I figure the addition of mounds of veggies helps me justify eating half a pound of pasta in one sitting.

So many vegetables- Pasta wtih Snap Peas, Asparagus and Goat Cheese

The first recipe is for pasta with prosciutto, snap peas, cream and mint, and I immediately bookmarked it when I saw it on Food 52 a couple of weeks ago.  Not only did I already have prosciutto in the fridge, but I love snap peas, AND it gave me an opportunity to use the first of the mint in our ever-burgeoning herb garden.  It may seem like this has a lot of things going on, but all of the flavors compliment each other nicely, and the snap peas add a crunch which is unexpected in a pasta dish.  I enjoyed that the mint added an extra fresh springy flavor, but if you don’t love mint in savory dishes this would be almost as delicious without it.  Despite having quite a few ingredients, this really just requires some chopping and then throwing everything into a pan, and it came together in pretty much the time it takes to boil and cook  the pasta.

After my discovery of this great combination of flavors I used leftover snap peas and some asparagus I had in the fridge for another summer-inspired pasta dish.  I was out of prosciutto and omitted the cream in this dish, but added goat cheese and fresh basil (also from our herb garden!) for an even simpler version.  Both recipes come together in under half an hour and are great uses of summer vegetables, so go down to your farmers market and get shopping!

Our herb garden! The basil is doing slightly better than the parsley. The mint is separate as apparently it is mean and overtakes everything.

Pasta with Prosciutto, Snap Peas, Mint and Cream
Adapted from Food 52
Serves 4

Equipment: Saucepan, frying pan, wooden spoon or spatula, knife

Ingredients:
4 cloves garlic, minced
3 tablespoons olive oil
1/4 pound prosciutto shank, finely diced (regular thin prosciutto works too)
4 shallots or 1/2 onion, minced
1/2 cup grated Parmesan cheese
1/2 pound fresh snap peas, chopped
1/4 cup fresh mint, chopped
3/4 pounds small pasta such as farfalle, penne, or orechiette
Salt and pepper to taste

Begin by chopping your vegetables. Put a pan of salted water on to boil.  Add pasta whenever it is boiling, but start to get your sauce ready in the meantime.  Do this by heating the olive oil over medium heat in a frying pan- when it is warm add the garlic and cook for 3-4 minutes, until fragrant but not burnt.  Add prosciutto and cook an additional 3-4 minutes (if using thin prosciutto cook only 1-2 minutes).  Add the shallots or onions and cook until they are beginning to soften, 3-4 minutes.  Season with salt and pepper.

With about 3 or 4 minutes left until the pasta is ready, add the peas to the frying pan.  After 2-3 minutes add the cream and quickly bring to a boil, stirring constantly.  Add the cheese, stir in, and reduce heat to low.  Drain the pasta when it is ready, and toss everything together in a big bowl. Add the chopped mint, garnish with more Parmesan cheese, and adjust salt and pepper to taste.

Pasta with Snap Peas, Asparagus, and Goat Cheese
Serves 2

Equipment: Saucepan, frying pan, wooden spoon or spatula, knife

Ingredients:
6 oz fresh snap peas (really however much you want- I used half of a 12 oz bag), chopped
1/2 bunch fresh asparagus, tough ends discarded and then chopped
1 clove garlic
4 oz goat cheese
1/4 cup fresh basil, chopped
1/8 cup grated Parmesan
2 tablespoons olive oil
Salt and pepper to taste

Put salted pasta water on to boil and chop your vegetables.  Add the pasta to the water when it is boiling, and heat up olive oil in a frying pan over medium heat.  When the oil is warm add garlic and cook for 2-3 minutes.  Next add the snap peas and asparagus, and cook for another 2-3 minutes.  Add salt and pepper to the vegetables.  Turn down the heat if the vegetables begin to brown while you wait for the pasta to cook.  Drain pasta when it is ready, reserving some of the pasta water.  Immediately toss with the vegetables, goat cheese, basil, and Parmesan.  If the sauce needs thinning add some of the pasta water, and add salt and pepper to taste.  Serve immediately with more Parmesan to garnish.

Greek Summer Salad

5 Jun

Greek salad with peppers, cucumbers, tomatoes and feta

As the season of endless barbecues approaches, it is always good to have a couple of stand by dishes that are easy to make and easily transportable.  I like bringing side salads that are more substantial than simply lettuce and dressing, such as potato salad or this pepper/cucumber/tomato salad.  I love this twist on a classic Greek salad, which only requires chopping up a few ingredients and throwing them in a bowl.  It is especially good for bringing places because the lack of lettuce and marinade-type dressing means it doesn’t get soggy, and actually gets even more delicious in the fridge overnight as the flavors all meld together.  The dressing is a very fresh red wine vinegar version, made even better by first using it to pickle the onions, which really takes out the bite of raw onion that not everyone is a fan of.  My only regret in making this twice in the past month for various barbecues is that it gets eaten up so quickly that I wish I had saved some in the fridge just for myself.

Greek Summer Salad
Adapted from Smitten Kitchen
Equipment: Bowl, knife, salad servers (or a couple large spoons to mix everything)

Ingredients:
1/2 cup red wine vinegar
1/2 cup water
1 tablespoon salt
2 tablespoons sugar
1/2 a red onion, diced quite finely
2 or 3 bell peppers
1 cucumber
1/4 pound firm feta cheese
1 pint cherry or grape tomatoes
1/4 cup olive oil
Salt and pepper to taste

Mix together the red wine vinegar, water, salt, and sugar in a smallish bowl until the salt and sugar have dissolved.  Add the diced onion and set aside for a few minutes.

Core and seed the bell peppers, cut them into 1/2 inch pieces, and place in a large salad bowl.  Chop the cucumber and feta into similar sized pieces and put them into the bowl as well.  Drain the onions from the vinegar mixture, but reserve the vinegar for the dressing.  Add the onions to the salad bowl, along with about 1/4 cup of the vinegar mixture. Drizzle with olive oil and season with salt and pepper. Toss everything together and adjust the dressing to taste- I usually use most of the vinegar mixture in the end. Serve immediately or let rest in the fridge for a few hours or overnight.

Shakshuka (Eggs in Tomato Sauce)

8 May

Does this look like Mickey Mouse to anyone else?

I am a big fan of cheap dinners that use mainly ingredients I already have in my cupboard, and this is one of my favorite go-to weeknight dinners for when I want something more exciting than pasta or a baked potato.  It is an Israeli dish of a spicy tomato sauce with poached eggs and feta cheese, and is seriously delicious.  I suppose the addition of eggs make this a brunch-appropriate meal, but I will eat eggs any time of the day, and have always made this for dinner.  It really only takes about 15 minutes to throw together and another 20 or so to cook, so is easy enough to make whenever you want.  I usually make a big batch, and eat it a couple nights a week, heating up the sauce and adding more eggs as needed.   You can also use any leftover sauce with pasta, cous cous, or as a pizza sauce if you don’t want the eggs every time.  The spice level can also be adjusted to your tastes- I usually err on the side of caution and only add 2 jalapenos, but if you’re making a big batch I would recommend adding one more, as the peppers really lose their spice once chopped up and cooked.

Shakshuka
Adapted from Smitten Kitchen/Saveur Mag

Poached eggs simmering away

Serves 4 to 6

Equipment: Knife, large saucepan, wooden spoon, bowl

Ingredients:
1/4 cup olive oil
5 Anaheim or 3 Jalapeno chilies, stemmed, seeded and chopped finely
1 small to medium onion, chopped
5 cloves garlic, crushed then sliced thinly
1 teaspoon ground cumin
1 tablespoon paprika
1 28-oz can whole peeled tomatoes (diced works too)
6 eggs (or as many as needed)
1/2 cup feta cheese, crumbled
1 tablespoon fresh parsley, chopped (optional)
Pita bread for serving
Salt

Heat oil in a large saucepan over medium-high heat, then add chilies and onions and sautee until soft and golden brown, about 6 minutes. Add garlic, cumin and paprika, and cook, stirring frequently, until garlic is soft, another 2 minutes.

Put tomatoes and their liquid in a large bowl and crush with your hands (this is a seriously good stress reliever).  Add the crushed tomatoes and liquid to the saucepan, along with 1/2 cup water, and simmer about 15 minutes, stirring occasionally, until the sauce has thickened slightly.  Season with salt, then crack eggs over the sauce.  Cover saucepan and cook until the whites are set and yolk still runny, about 5 minutes.  Spoon out eggs and tomato sauce onto plates, and sprinkle the feta and parsley over each plate. Serve with pitas for dipping, or alternatively cous cous on the side.

Mushroom Lasagna

23 Apr

Finshed mushroom lasagna!

The Spice household has gone away to the mountains in Virginia for Easter weekend, and while other members of the family have productive things to do (sorry Gina, that 25 pg essay you’re writing next to me looks fascinating), I decided to use this time and my parent’s food budget to make delicious things for all of us.  I wanted to make a large dish that I usually wouldn’t make for myself, and following the success of my vegetable lasagna decided to go the baked-pasta/lasagna route again.  I found this recipe while browsing through one of my idol Ina Garten’s cookbooks, and thought it fit the bill perfectly.  Once I saw that Smitten Kitchen has also tried and had great success with this, I was completely sold.

Mmmmushrooms

To say the lasagna lived up to expectations would be an understatement- it was delicious and the four of us easily polished off the entire thing.  This is simpler than most lasagnas, as the layers are only a bechamel sauce, sauteed mushrooms, and Parmesan, but the simplicity really lets all of the flavors meld together beautifully.  The creamy sauce and Parmesan highlight the mushrooms and I didn’t feel like it was missing meat or tomato sauce at all.  This took about 2 hours to make start to finish, but only about an hour of preparation before it goes in the oven, and this was without any help chopping or assembling from my dear family.  The one complaint I have was that it used quite a few pots and pans for something that seems so simple- this was mainly because Ina suggests you heat the milk before making the bechamel, which adds a step but is probably necessary when making such a large quantity of sauce. I added a clove of garlic as per Smitten Kitchen’s suggestion and did a mixture of cremini and portobello mushrooms, but otherwise kept the recipe intact.

Mushroom Lasagna
From Ina Garten

Equipment: Knife, Baking dish (8×12 or 9×13), large pot, saucepan, frying pan

Ingredients:
Salt
Olive oil
3/4 pound dried lasagna noodles
1 large clove garlic, minced
4 cups whole milk
3/4 cup (12 tablespoons or 1 1/2 sticks) unsalted butter, divided
1/2 cup all-purpose flour
1 teaspoon freshly ground black pepper
1 teaspoon ground nutmeg
1 1/2 pounds cremini or portobello mushrooms (I used 3 portobellos and the rest cremini)
1 cup freshly grated Parmesan

Preheat the oven to 375 (I waited to do this until after the noodles were cooked and bechamel started).  Bring a large pot of water to boil, with some salt and oil.  Add the noodles and cook for 10 minutes.  Drain and set aside- if you feel they are going to stick a lot drizzle a bit more oil on them once drained.

Make the bechamel/white sauce: Bring milk and garlic to a simmer in a saucepan or heat in the microwave.  Melt one stick of butter in a large pot (I reused the pot the noodles cooked in). When the foam from the butter has subsided, add the flour over low heat, and whisk constantly for about a minute.  Start adding the milk into this mixture a little bit at a time.  When you add the first bit of milk, the mixture may clump and you will think you have gone wrong.  You haven’t.  Just keep adding the milk and stirring after each addition until the milk is all added and you have a thick white sauce.  Add salt, pepper, and nutmeg, and adjust seasonings to taste.  Take off heat and set aside.

Prepare mushrooms:  Discard the stems of the portobellos and trim stems of creminis. Slice mushrooms into 1/4 inch thick pieces.  Heat 2 tablespoons olive oil and 2 tablespoons butter in a frying pan or saucepan, and sautee half of the mushrooms with a pinch of salt for about 5 minutes, until they are releasing some liquid.  Remove those mushrooms into a bowl and repeat with 2 more tablespoons olive oil, butter, and remaining mushrooms.

To assemble:  Spread some sauce in the bottom of your baking dish, followed by a layer of noodles.  Then spread 1/4 of remaining sauce on top of noodles, followed by 1/3 of the mushrooms, and 1/4 cup of Parmesan cheese.  Repeat this twice.  For the final layer, top the noodles with remaining white sauce and another 1/4-1/3 cup Parmesan cheese.  Bake for 45 minutes, until top is browned and sauce is bubbling.  If you can resist digging in right away, let sit at room temperature for 10-15 minutes.  We did not let it rest and it was still excellent.

Kale Quiche

13 Apr

Slightly mis-shapen quiche

Due to Father Spice’s well documented love of kale, I thought I would pick some up at Eastern market when Gina and I went a couple of weeks ago.  I ended up getting a very large bag of it for a good price, and have been trying to think of creative kale-uses ever since.  Last weekend I decided to bake the first of the kale into a quiche, which seemed like an easy way to use some up and feed myself and my roommate for a couple of nights.  It was a roaring success, and very easy to make- just remember that the crust needs to chill for an hour or so before you roll it out, so make that part first, then wander around the house watching Say Yes to the Dress for a bit.  This crust was excellent- very flaky and crispy, and I was glad that I didn’t trim the edges but just folded them over for an even better crust-to-egg ratio.  I would probably add more cheese the next time I make it so the flavor really comes through, so I’ve upped the amount in the recipe below, but if you want to pretend to be health-conscious for a night use a bit less.  You could also add some sauteed onions, garlic, herbs, etc, to up the flavors, but I was being lazy so just focused on the kale.

If you ignore the stick of butter, it looks healthy!

Kale Quiche
Adapted from Smitten Kitchen/Bon Appetit and Martha Stewart, among other random internet findings
Serves 4-ish

Equipment: Pie dish/tart pan (I used a 9-inch pie dish), food processor or pastry cutter, rolling pin

Ingredients:
For the crust:
1 1/4 cups all-purpose flour
1/2 cup (one stick) butter, chilled and cut into small pieces
1/4 cup ice water
1/2 teaspoon salt

For the filling:
1 bunch kale (I don’t really know what this means- I used half of a very large bag)
1/2 tablespoon oil
4 eggs
1/4 cup half and half or milk
1/2 cup grated cheddar
1/4 cup grated Parmesan
1/4 teaspoon salt
1/4 teaspoon pepper

Start by making the crust- first put a couple of ice cups in some water and set aside.  Put the flour and cold sliced butter into a large bowl and cut with a pastry cutter until the butter is the size of small peas. Alternatively, pulse in a food processor a few times.  Add the iced water one tablespoon at a time (or drizzle into the food processor while running), only until the dough comes together and you are able to form it into a ball.  It should just stay together without falling apart.  Form the dough into a ball, wrap in clingfilm, and chill for at least an hour.

For the filling, first remove and tough stalks from the kale pieces.  Rinse the kale in water, and the saute with 1/2 tablespoon oil for 3-5 minutes or until bright green and tender. Let cool.  Add eggs, half and half, the cheeses, and salt and pepper to a bowl and whisk to combine, then add the kale and mix that into the egg mixture as well.

Preheat oven to 375 degrees. To assemble, roll the chilled dough out into a circle and press into a lightly greased pan.  Pour in the egg mixture and fold over or trim the excess dough.  Bake for 20-30 minutes, or until crust is light brown and filling puffed.  Up the temperature to 400 for the last 5 minutes or so if you want the crust to get more golden.

Cous Cous Salad and Simple Vinaigrette

30 Mar
Not wah cous cous, yum cous cous!

Cous cous always brings me back to my boarding school days, where we had a kitchen with a fridge, microwave, and kettle, but no hob (I actually don’t remember the American word for a hob- burner/burner ring perhaps?).  Since we had a kettle you could boil water and prepare pasta in the microwave, or, more easily, cous cous.  Cous cous and pesto was a very popular boarding school staple, and I still always buy it when I’m stocking up my kitchen since it’s a great accompaniment to meat or fish dishes, and also pretty filling on its own.  The other night I made a whole package of pre-seasoned cous cous to go with my teriyaki chicken tenders, and then used the cold leftovers to toss with some vegetables and reuse as a lunch salad.  I put some cherry tomatoes, avocado, and spinach in with the cold cous cous, then topped it all with my favorite simple vinaigrette.  Other than the possibility of the spinach/lettuce wilting a little if you over-dress this, it keeps very well in the fridge for a few days, so make a big batch and use it as a side dish or lunch all week!

The vinaigrette is what I always have in a glass beaker in the kitchen for whenever I get the urge to have a salad with whatever else I’m eating (last week I actually put a salad on a pizza. I know this defeats the purpose of a salad, but it was delish.)  I can’t really provide specific measurements, but will give an estimate below, and make sure to taste it and add some more oil, vinegar, etc, until it is right for you.  Then pour over salads, halved avocados, cous cous, whatever you want!  Oh and, a note on the cous cous.  Be careful when you open the package, those beads will get everywhere if they are spilled. Wah cous cous.

Cous Cous Salad
Serves 4 as side dish or lunch

Ingredients:
1 package Near East Cous Cous (the varieties with garlic/herb seasoning are good), or other cous cous with about 4 servings, cooked and cooled
1/2 pint cherry tomatoes, halved
1 avocado, diced
3 oz baby spinach
2-3 tablespoons balsamic vinaigrette, recipe follows

Place cous cous, cherry tomatoes, and avocado in a large bowl and toss together, breaking up any large lumps of cous cous. Add the spinach drizzle with vinaigrette, then toss everything together again.  Taste and add more vinaigrette if needed.


Simple Balsamic Vinaigrette

Ingredients:
6 tablespoons extra-virgin olive oil
2-3 tablespoons balsamic vinegar
1 clove garlic, put through a garlic press or very finely minced
1 tablespoon lemon or orange juice
Salt and pepper

Put all ingredients in a mason jar or glass beaker and shake well.  Taste and adjust according to your own preference.