Tag Archives: chicken

Resturant Review: Founding Farmers Brunch

12 Jul

Heaven in a brown paper bag.

Brunch. Founding Farmers. These are two of my favorite things, and combine them with a group of friends reminiscing on the previous night’s activities, some bloody marys and fried dough topped with sugar, and you have a pretty perfect couple of hours.  Founding Farmers has delicious food for all three meals- their mission is to support farmers and provide sustainable and quality food options, which means everything is very fresh and very delicious.  If it weren’t for the excellent brunch items I would say save a trip there for the dinner menu, which includes steak, maple glazed salmon, and amazing flatbreads.  But since they do also serve one of the best brunches in DC, you will have to resign yourself to trying multiple meals there.

Chicken and waffles and gravy, oh my.

I’ve been to Founding Farmers for brunch before, but this article on their beignets meant I was clearly well past due for another trip.  I am usually a strict savory breakfast type, but sweet menu offerings such as overstuffed French toast, which comes stacked like bricks on a extra-large plate, and the aforementioned beignets have me rethinking my eggs-and-bacon loyalties.  We got an order of beignets for the table, and literally ceased talking for 5 minutes as everyone devoured the crispy and sweet fried dough topped with powdered sugar and served with chocolate, caramel, and raspberry dipping sauces.  For my brunch main course, only after much consideration and indecisiveness, I ordered the Chicken and Waffles- one large waffle with two eggs, a crispy chicken tender, white gravy and maple syrup.  Although this had a lot going on, all of the flavors and textured melded perfectly together, to the point where I was eating bites of chicken and waffle with both the syrup and gravy heaped over top.  The white gravy was creamy and flavorful, and the chicken was cooked to a perfect crispness.  My only minor complaint is that the poached eggs were from a mold, which weirdly rubs me the wrong way, because eggs should not be shaped like cones (told you it was a minor complaint).

One serious bloody mary.

Other orders at the table included the Pastrami Hash, which looked and tasted delicious, although seemed like much less food than the other over-sized offerings.  I am tempted to try that and some of the other hash dishes in the future though, as well as the pan scrambles.  I was also convinced to try my first Bloody Mary here- I’m usually more of a mimosa girl, but figured the Founding Farmer’s Bloody Mary would be a pretty excellent one as an introduction.  I wasn’t wrong- it was very peppery and filling, and certainly woke you up in the morning.  It took me the better part of an hour to finish the whole thing due to the spicy-tomatoy-ness, but I would definitely count it as a new-experience success.  All in all, there was not much about this brunch I would change (the business of Founding Farmers on a Sunday morning is one drawback, but Founding Farmers is always busy so I usually assume I won’t be seated until 15 minutes after my reservation anyway), and I only wish I had room in my stomach for more than one main course with all of their selections.

First Attempt at Empanadas

1 Jun

Not the prettiest empanadas around

I think there are definitely some foods that are easier to cook if you grew up watching them being made in your kitchen. I may not have picked up the exact recipe for risotto from my mom, but I made a pretty good version on my first attempt because I knew what the technique was all about from watching her make it many times. Empanadas, however, had never been seen in our kitchen until a couple of weeks ago, when I decided to try making them. My parents noted that they are essentially Cornish pasties, a British staple, with a different dough… but that didn’t help much, as we’ve always bought Cornish pasties instead of making them. So I was on my own here, hoping the sauce was the right consistency and inexpertly rolling out discs of dough to inconsistent thicknesses. I’m sure they would have been prettier (and maybe tastier) if I had had years of experience watching and helping someone make them, but I think they turned out pretty delicious regardless, and hopefully I will just get better at it. Next time, I would probably chop the chicken finer and thicken the sauce even longer, as I felt I ended up with mainly big chunks of chicken in these, instead of all the other delicious things.

Making things round is hard

Empanadas, and especially these empanadas, are definitely not a quick dinner. The dough can be made ahead of time, and I would suggest making the filling well ahead of time, as well, so that you are not sitting around hoping it will hurry up and cool already. The original recipe from Smitten Kitchen/Gourmet made extra dough for the amount of filling. I went the opposite route and made more filling than dough (because I couldn’t be bothered thinking through too many conversions). I still came out with 12 empanadas, which left lots of leftovers after 3 of us ate them for dinner, and the filling was delicious on its own for lunch. I also accidentally had Mexican/fresh rather than Spanish/dried chorizo. It worked fine but required pre-cooking, which the Spanish would not.

The finished filling

Chicken, Chorizo and Olive Empanadas (Adapted from Smitten Kitchen)
Makes 12 empanadas, with leftover filling
Equipment: Baking sheet, preferably with silpat; large skillet with lid
Ingredients
Dough:
1 3/4 cup all-purpose flour
1/2 cup whole wheat flour
1 stick (1/2 cup, 8 tablespoons) unsalted butter, cold
1 large egg
1/3 cup ice water
1 tbsp distilled white vinegar

Filling:

About 2 pounds chicken. Whole legs (including thighs), or whole bone-in breasts, split.
1 tsp salt
1/4 tsp black pepper
4 1/2 tbsp extra-virgin olive oil
2 large onions
2 bay leaves
1 1/2 oz (1/3 cup chopped) dried Spanish chorizo, or 2-3 links fresh Mexican chorizo
1/2 tsp smoked Spanish paprika
1/4 cup chopped pitted green olives
1/2 cup dry white wine
1/2 cup reduced-sodium chicken broth
1 egg for egg wash

Make Dough: Up to six hours ahead of time, sift flour with salt into your largest bowl. Cut butter into 1/2 inch cubes, and work into flour with fingertips or pasty blender until it resembles coarse meal, with some (roughly pea-sized) lumps. Beat together egg, water, and vinegar in a small bowl. Add to flour mixture, mixing with fork until just incorporated, the mixture will look shaggy. If bowl is big enough, gather dough in bowl and knead gently once or twice with heal of your hand until it just comes together. If your bowl is not big enough, do this step on a lightly-floured surface. Form dough into a flat rectangle and wrap in plastic wrap. Chill 1-6 hours.

Make Filling: If using fresh chorizo, remove from casings and brown in large, heavy skillet over medium heat until some fat has rendered out. Drain fat and remove chorizo. Pat chicken dry and sprinkle with salt and pepper. Heat 2 tablespoons oil in the large, heavy skilled over moderately high heat until hot but not smoking, then brown chicken, turning over once, about 6 minutes total, and transfer to a plate. Halve onions lengthwise and then cut lengthwise into 1/4-inch-wide strips. Mince garlic cloves. Saute onions, garlic and bay leaves in fat remaining in skillet, stirring frequently, until onions are softened, 4-5 minutes.

Add chorizo and paprika and cook, stirring, 1 minute. Add olives, wine, and broth and bring to a boil, stirring and scraping up any brown bits. Return chicken to skillet along with any juices accumulated on plate, then reduce heat to moderately low and simmer chicken, covered, turning over once, until tender, 25 to 30 minutes total.

Transfer chicken to a clean plate. (Sauce in skillet should be the consistency of heavy cream; if it’s not, briskly simmer until slightly thickened, about 5 minutes.) (Gina’s note: no idea if my sauce was the right consistency, but it seemed pretty thin even after simmering for a few minutes.)When chicken is cool enough to handle, discard skin and bones and coarsely chop meat. Stir chicken into sauce and discard bay leaves. Season with salt and pepper, then cool filling, uncovered, about 30 minutes.

Form Empanadas: Put oven racks in upper and lower thirds of oven and preheat oven to 400°F. Divide first dough into 12 equal pieces and form each into a disk. Keeping remaining pieces covered, roll out 1 piece on a lightly floured surface with a lightly floured rolling pin into a 5-inch round (about 1/8 inch thick).

Spoon about 2 tablespoons filling onto center and fold dough in half, enclosing filling. Press edges together to seal, then crimp decoratively with your fingers or tines of a fork. Transfer empanada to a baking sheet, lined with a silicone mat or waxed paper. (Mine stuck fiercely to parchment paper.) Make eleven more in same manner.

Beat an egg with 1 tbsp of water. Lightly brush empanadas with some of egg wash and bake in upper and lower thirds of oven, switching position of sheets halfway through baking, until golden, about 25 minutes. Transfer empanadas to a rack to cool at least 5 minutes. Serve warm or at room temperature.


Parmesan Baked Chicken Tenders

21 Mar

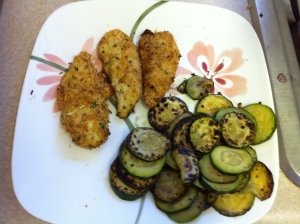
I negated the healthy non-frying of the chicken by frying the zucchini instead. Oh well.

Unfortunately my time in Qatar was not very exciting eating-wise, so I don’t have delicious drinks and baked goods to blog about like Gina did (although the juices, called “cocktails” in a dry-ish country, were delicious).  And while I could describe all of the contents of the extensive Doha Sheraton buffet breakfast, lunch, and dinner, I don’t think that would be too exciting for anyone.  So when I got home I was all buffet-ed out, went on a massive shopping spree at Trader Joe’s, and made these very simple, but very yummy, chicken tenders for dinner.  They are baked instead of fried, partly because it’s healthier, but mainly because it is also a lot less messy and easier- I can never seem to get the temperature of the oil right and end up with burnt-ish outsides by the time the chicken is cooked through.  When you drizzle the tenders with oil and bake them at a high heat they still get satisfyingly crispy, and (bonus!) I can watch reruns of How I Met Your Mother while they are in the oven instead of getting splattered with oil.  I use a triple-dip method of flour-egg-breadcrumbs, which works very well for extra crunchy-ness, but if you want you could also just use egg and breadcrumbs, or substitute milk for the egg to get everything to stick.

Parmesan Baked Chicken Tenders
Adapted from Serious Eats, and my brain

Serves four

Equipment: 3 small bowls, baking sheet

Ingredients
1/3 cup breadcrumbs (I use 4C pre-seasoned ones)
1/3 cup grated Parmesan
1/4 cup flour
1 egg
1 1/2 pound chicken tenders, or chicken breasts cut into strips
2 tablespoons olive oil
Salt and pepper

Preheat oven to 450 degrees.  Place flour in one bowl, whisked egg in one bowl, and mix breadcrumbs and Parmesan in a third bowl.  If the breadcrumbs are unseasoned add salt and pepper, and dried herbs if you wish.  Line baking sheet with parchment paper or a silicone baking mat.  Dip chicken tenders one at a time in flour, egg, then breadcrumb mixture, making sure to let most of the egg drip off before putting it in the breadcrumbs.  Place the tenders one at a time on the baking sheet.  When they are all ready, drizzle with olive oil, and place in the oven for 15-20 minutes, or until golden brown and cooked through.

One chicken, endless possibilities

9 Feb
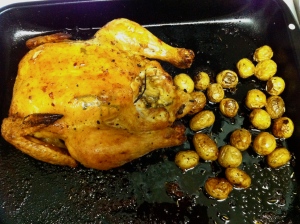
Small chicken. Tiny potatoes.

One night last week I was avoiding doing things like file for student aid and browsing some food blogs and found this recipe for “the best roast chicken ever” on smitten kitchen.  I was intrigued, and wanted to try it as 1) I don’t always love roast chicken (I tend to just eat my weight in the accompanying potatoes) and 2) I hadn’t made a big “real person” meal in a while.  But if you make a whole chicken for only one or two people you tend to have a lot of leftovers, and no mater how good this chicken was, I didn’t know if I wanted to eat roast chicken every night this week.  So I started to brainstorm about how I could use the leftovers from the potentially amazing chicken.

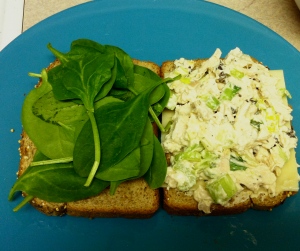
Chicken salad sandwich

Now, I wouldn’t say that I’m an overly frugal person, but realizing that I can save enough money during the week to finance my happy hour habit means that I make my own lunch pretty much every day.  So my brilliant idea to use up lots of chicken was to make chicken salad that I could make into lunch for work.  So resourceful! Since the chicken itself was only about 6$, and I already had most of the ingredients for chicken salad, this ended up being a very good idea for my wallet (and my stomach, but more on that later).  To make this chicken go further, I even decided to make chicken stock because most of the ingredients needed for chicken salad are also included in chicken stock.  It’s like this was all planned perfectly for me.  Moral of the story: one chicken = lots of meals for Roxie.

So how was the chicken? Really really good.  I’m normally a total white meat girl, but this skin was super crispy and I found myself pulling off the wings and drumsticks since they were so crispy on the outside and tender on the inside.  I will say that I hope you like your chicken with a side of smoke, because with this method you roast the chicken at a very high temperature which led to a lot of smoke from the fat burning off.  Also I skimped on the time you let the chicken rest while salted- apparently I was meant to season it and then wait two days to cook it, but really, who has that sort of time?  I waited an hour, it turned out fine.  Although if you have patience I’m sure resting it longer would make the meat even more flavorful and tender.  Don’t be intimidated by the long recipe- it’s really very easy. The chicken salad was also a huge success, and I will definitely make it or something similar again.  The stock is currently bubbling away on my stove, so fingers crossed that experiment also works out and leads to some soups to ward off a winter cold.  Who knew 6 bucks could lead to this much fun in the kitchen?

Perfectly Perfect Roast Chicken
Adapted from Zuni Cafe/Smitten Kitchen

Equipment: One baking dish or shallow pan to fit the chicken, knife

Ingredients:
1 small chicken (2 3/4 to 3 1/2 pounds if you can find it)
4 sprigs fresh rosemary (or other fresh herb)
Salt and Pepper
A little water

Prepare Chicken: Remove and discard the lump of fat inside the chicken. Rinse the chicken and pat very dry inside and out. Approaching from the edge of the cavity, slide a finger under the skin of each of the breasts, making 2 little pockets. Now use the tip of your finger to gently loosen a pocket of skin on the outside of the thickest section of each thigh. Using your finger, shove an herb sprig into each of the 4 pockets.

Season: Season the chicken liberally all over with salt and pepper. Season the thick sections a little more heavily than the skinny ankles and wings. Cover loosely and refrigerate for up to 2 days.

Cook: To cook, preheat oven to 475 or 450 if your oven gets very hot.  Place the dish you will cook the chicken in into the oven to heat it before the chicken starts to cook. Wipe the chicken dry, take the dish out of the oven (with gloves!), and place chicken breast side up in the oven.

Place the chicken in the pan in the center of the oven and listen and watch for it to start browning within 20 minutes. If it doesn’t, raise the temperature progressively until it does. The skin should blister, but if the chicken begins to char, or the fat is smoking, reduce temperature by 25 degrees. After about 30 minutes, turn the bird over — drying the bird and preheating the pan should keep the skin from sticking.  I used a spatula and oven gloves to do this.  Roast for another 10 to 20 minutes, depending on size, then flip back over to recrisp the breast skin, another 5 to 10 minutes. My chicken was almost 4 pounds, and I cooked it for a total of just over an hour.

Rest: Remove the chicken from the oven and turn off the heat. Lift the chicken from the roasting pan and set on a plate. Rest the chicken for at least 10 minutes before eating to allow the juices to distribute.

Chicken salad recipe (I modified a bit by taking out the grapes and replacing with raisins, but this is a good starter recipe)

Chicken stock recipe (again, I modified to use up what I already had in my fridge, but you need most of these ingredients to make the stock good)

How to Survive Maine Winters

20 Jan

Gina has Le Creuset (and chili) envy

As Roxie keeps telling me, I’ve been extremely negligent about blogging recently. I ensure you that will change very shortly, but for now enjoy Emma’s scrumptious-looking white chili!- Gina

Greetings from Maine! Emma, here. I’m writing from my parents’ house in Bangor, where it’s currently 9 degrees outside and the forecast for tomorrow predicts 6-10 inches of snow. Needless to say, I’m doing everything I can to stay warm. That includes spending minimal time outdoors, outfitting myself from head to toe in fleece and wool, and cooking up cozy meals like this Creamy White Chicken Chili.

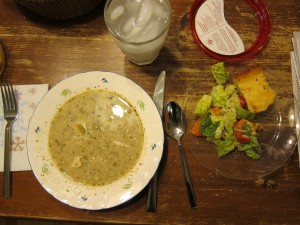
The perfect meal?!

I adapted the recipe (with only a few small changes) from one of my favorite food blogs, “Eat, Live, Run.”  I recommend serving this with a bowl of blue tortilla chips, if only to bring some color to the table. A great meal for a cold winter’s night!
Creamy White Chicken Chili (Adapted from Eat, Live, Run)
Equipment: one large pot
Ingredients:
2 lbs boneless chicken breast, cubed
2 medium onions, small diced
1 T extra virgin olive oil
20 oz. chicken broth
2 cans cannellini beans
1 can kidney beans
2 4oz cans of green chiles (found in the Mexican food aisle…that took me a while)
1 tsp salt
1 tsp cumin
1 tsp cayenne pepper (less if you’re adverse to spiciness)
2 garlic cloves, minced
.5 cups half and half
8 oz. lite sour cream 

Method:

1. Heat the oil in a large pot. Saute the onion and chicken until the onion is clear and the chicken is seared (5-10 minutes).
2. Add garlic and cook for another 3 minutes.
3. Add beans, spices, chicken broth, and green chiles and bring to a boil. Reduce heat and simmer for 30 minutes.
4. Remove from heat and mix in half and half and sour cream.
Serves 6

Grilled Chicken Pesto Pizza

24 Oct

Pizza just out of the oven. Look at all that cheesy goodness.

Who doesn’t love pizza?  I’m one of those people who will eat basically any type of pizza, ranging from the cheapest arguably-inedible frozen grocery store pizza to authentic Italian pizza from a little old man who’s family has been making it for generations.  Really though, I’m in the camp that says anything slathered in sauce and cheese will taste good.  Which is why I was very excited when I made the discovery recently that it is very easy for one to make at home, especially if you use pre-made dough, which you can get at places such as Trader Joes or Whole Foods very cheaply.  I’ve made a couple of different versions, but the one I made most recently was with pesto, mozzarella, and grilled chicken, and I used Trader Joes Garlic and Herb pizza dough as the base.   It was very yummy, and as a bonus those with tomato aversions like my old roommate Jill (Hi Greebs!) can still eat it because pesto is used as the main sauce.  I grilled a chicken breast and cut it up to add to the pizza, but it would be very delicious without, and you could of course use marinara or plain tomato sauce on this as well if you would like.  The best thing is, you can reheat this in an oven very easily the next day or two days later and it still tastes great.  Or if you are lazy and very hungry you can just eat it cold straight from the fridge.  I don’t judge.

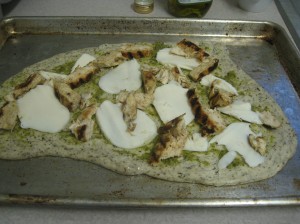
Mostly-assembled pizza

Grilled Chicken Pesto Pizza

Equipment: Oven, grill pan/frying pan, sheet pan, knife

Ingredients:
1 package pre-made pizza dough
1 chicken breast
2 tablespoons pesto
5 ounces fresh mozzarella cheese, sliced thinly
1/4 cup freshly grated Parmesan cheese
1 tablespoon olive oil
1/2 teaspoon paprika
Salt and Pepper

If using pre-made pizza dough (I used the garlic and herb version from Trader Joes this time), let it sit out at room temperature for about 20 minutes so it is easier to work with.

While the dough is out, prepare your chicken. Heat a grill pan or grill and place the chicken breast between two pieces of parchment and pound until it is a uniform thickness (about 1/2 an inch thick or less). Salt and pepper both sides, and add paprika to both sides if desired. Spray pan with non-stick spray or oil, and grill for 7-10 minutes on each side or until chicken is cooked through. Remove to plate and let cool while you prepare the dough.

Preheat the oven to 475F. Drizzle some olive oil onto a sheet pan. Stretch out the dough using your hands- I usually hold it from one end and let it drop down and then keep stretching it this way until the middle parts are quite thin. When it is stretched, place on the sheet plan, you can continue to work it into the shape you like once it is on the pan. Spread the pesto over the dough first, and then evenly place the slices of mozzarella over the pesto. Slice your chicken into thin strips and place over mozzarella. Finish with a good grating of Parmesan cheese, and place pan in the oven for 12-15 minutes, or until crust is golden and cheese is bubbling but not overcooked or hard. Take out and enjoy!