Archive by Author

Everyday Muffins + Things That I Eat

17 Sep

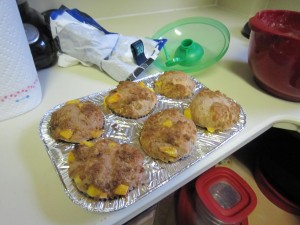
Peach-filled, brown sugar-topped muffins

So school has started up again for both of us, and all of a sudden I can’t just spend hours cooking something cause it might make a delicious dinner. I don’t have a meal plan this year, so I have to think ahead and go on grocery trips and make sure I have leftovers to bring to work. Phew. Most of the stuff I’ve been cooking hasn’t been too exciting, but I’m going to post some links below to the kind of recipes I depend on– generally meatless, pretty much one-pot meals that make enough for six even though I’m only feeding one. Getting through the leftovers is a challenge I’m usually up to.

I'll be so sad when peach season is over.

But in more exciting news, my house this year is throwing weekly brunches, which means I do get to do a little baking for fun (without the guilt that I will have to eat everything I make). I’ve been making these awesome muffins with apples for a while, whenever I want something around to snack on/have for an unhealthy breakfast. I made them with peaches this time, but I think I might prefer the apples cause they hold their texture better– or maybe I just didn’t have enough peaches. Whichever way you try them, don’t skimp on the brown sugar on top– it makes an awesome crust.

Linkage:

Alice Waters’ Ratatouille— Take advantage of summer vegetables while they last! Delicious on cous cous with a fried egg on top.
Lentils and Rice– On my meal plan for this week, a cheap and complete meal.
Baba Ghanoush– Not technically a meal, but that is the beauty of only feeding yourself.
Baked oatmeal– I just made this for breakfast tomorrow. Hopefully a good way to prepare oatmeal ahead of time (without buying gross instant stuff).

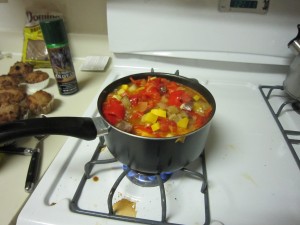
My little pot could barely hold the bounty of ratatouille

Brown Sugar Peach Muffins (adapted from King Arthur Flour/Smitten Kitchen)
Equipment: 2 Bowls, hand mixer or wooden spoon, muffin tin
Ingredients:
1 cup (4 oz) whole wheat flour
1 cup (4 1/4 oz) All-purpose flour
1 tsp baking powder
1 tsp baking soda
1/4 tsp salt
1 tbsp cinnamon
1/2 cup (1 stick, 4 oz) unsalted butter, room temperature
1/2 cup (3 1/2 oz) granulated sugar
1/2 cup dark brown sugar, packed, divided
1 large egg
1 cup (8 oz) buttermilk or plain yogurt
2 large peaches or apples

Method: Preheat the oven to 450F. Grease and flour, or line with muffin liners, a 12-18 cup muffin tin (yield varies depending on how much fruit there is/how much you fill the cups).
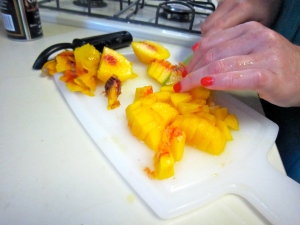
Peel the fruit and chop coarsely. Mix together the flours, baking soda, baking powder, salt, and cinnamon, and set aside. In a separate bowl, cream the butter with a hand mixer or a spoon and some elbow grease. Add the granulated sugar and only 1/4 cup of the brown sugar, and cream until fluffy. Lightly beat the egg, and add it to the sugar/butter mixture. Mix well, and then gently stir in the yogurt or buttermilk; over stirring may cause the mixture to curdle if using buttermilk. Stir in the dry ingredients and then fold in the fruit.
Divide the batter among the muffin tins; you can fill them almost all the way. Sprinkle the remaining 1/4 cup brown sugar on top of the muffins, and bake for 10 minutes. Turn the heat down to 400F, and bake for an additional 5-10 minutes, until a tester comes out clean. Cool the muffins for five minutes in the tin, and then remove them to cool completely. Try not to only eat the tops.
Lemon Raspberry Yogurt Cake

1 Aug

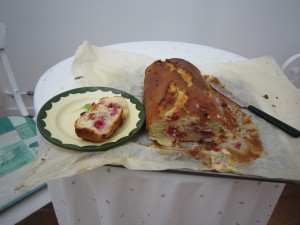
Delicious summer cake

Summer seems to have gotten away with us slightly. I still owe you a Morocco post, Roxie has now skipped off on her own vacation, and I have not done nearly enough cooking with all of the beautiful summer produce.

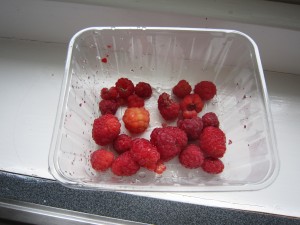
I attempted to "pick my own" raspberries for this, but seemed to have missed the good ones. (I bought extra)

This cake was my first attempt, post-Morocco, to rectify that. It is quick, it is delicious, and it is extremely versatile. Throw in whatever berry you want, switch out the lemon… I think a lime/raspberry combination would also be delicious. I had way fewer raspberries than called for and it still worked out fine, just more lemony than raspberry-y. Basically, this is a great cake to make the most out of summer fruit without too much effort.

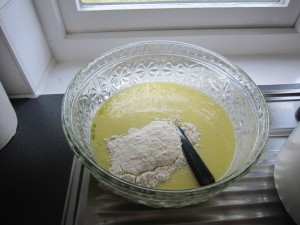
I couldn't find a whisk (or many baking supplies at all) in our English kitchen

Lemon Raspberry Yogurt Cake (Adapted, as always, from Smitten Kitchen)

Equipment: Mixing bowls, whisk, zester/grater, loaf tin or other cake pan (adjust baking time if using different sized pan)
Ingredients:
1 1/2 cups plus 1 tbsp all-purpose flour
2 tsp baking powder
1/4 tsp salt
1 cup plain whole-milk yogurt
1 cup regular sugar plus 1 tbsp caster/superfine sugar, if you have it
3 extra-large eggs
Zest of 2 lemons
1/2 tsp vanilla extract
1/2 cup olive oil
1 1/2 cup raspberries, fresh or frozen and thawed
1/3 cup freshly squeezed lemon juice
Method: Preheat the oven to 350F. Grease a standard loaf tin, then line with greaseproof paper and grease and flour the paper.
Sift together 1 1/2 cups flour, baking powder, and salt into a bowl. In another bowl, whisk together the yogurt, 1 cup of the sugar, the eggs, lemon zest, vanilla, and oil. Slowly whisk the dry ingredients into the wet ingredients. Toss the berries with the remaining tablespoon of flour, and carefully fold into the batter. Pour the batter into the prepared pan and bake for about fifty minutes, checking that a skewer inserted into the middle comes out clean.
Towards the end of the cooking time, make a glaze. If using granulated sugar, cook together the lemon juice and 1 tbsp of sugar until the sugar is dissolved and the mixture is clear. If using caster/superfine sugar, you can get away without cooking it if you’re lazy like me. (You can also get away with this if using granulated, and will have a nice crunchy glaze.)
When the cake is done, remove and allow to cool for ten minutes in the pan before flipping out onto a cooling rack. Pour the lemon-sugar mixture over the cake while it is still warm, with something underneath to catch the drippings. Little holes made with a toothpick in the cake help to draw the syrup in better. Cool and serve!

Eating in Morocco, Part 2: The Cheap Stuff

14 Jul

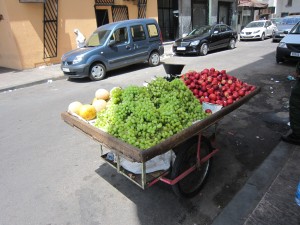
Abandoned fruit... for the taking?

I have just over a week left in Morocco, and I feel like I’ve run the gamut of restaurant types. I’ve eaten everywhere from a stand in the middle of a crazy, smoky square in Marrakesh to restaurants in opulent old houses that suddenly appears at the end of a dark alley in the medina of Fez. I’ve also

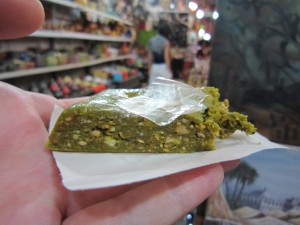
Pistachio nougat

eaten at all the in between places—restaurants in gas stations, which is apparently a big thing, and the little places scattered across the town I’m in. I’ve found that my most memorable meals have come at the extremes of the spectrum. Donuts fried in front of you at a sweet stand, sprinkled with sugar and eaten standing up in a split second. Tables groaning under plate upon plate of different vegetables, and that’s just the first course. The stuff in between tends to blend together into one big tagine. That’s not to say that you can’t get great food at the mid-range restaurants, it’s just harder to tell if the lemon chicken tagine is going to be sublime or just mediocre.

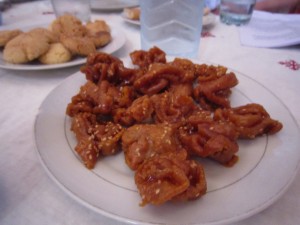
Super decadent chebakia

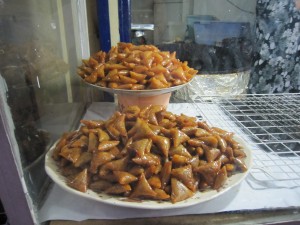
Unusually, these sweets were actually behind glass!

Let’s start with the cheap stuff. We’ve walked through a whole bunch of medinas (the old section of Moroccan cities) at this point, and every time we pass a food stall (usually either dried fruits or sweets), I crane my neck and sometimes succumb to the temptation to dig in. In Marrakesh there were carts everywhere selling different kinds of nut paste/nougat thing. I got some pistachio, which was delicious—very sweet, I think sweetened with honey, but the pistachio flavor shined. In all the medinas you’ll also find pyramids of honey-soaked sweets, often covered in flies and bees. The most ridiculously indulgent (in the best way possible) are the chebakia, made from dough that is deep fried and then doused in honey and orange blossom water. Also delicious are little envelopes of pastry, coated in honey, filled with almond or peanut

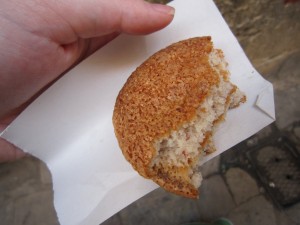
Almost like a peanut butter sandwich...

paste. And while we’re on the topic of peanuts, one of my friends bought what she described as a “Moroccan whoopee pie” from a vendor in the Fez medina. It was two puffy almond-meal cakes sandwiched around a peanut butter filling—utterly delicious, and an excellent breakfast. Freshly squeezed orange juice also abounds in markets, but I was drawn instead to the tea stalls in Jma al Fna in Marrakesh. Instead of the ubiquitous Moroccan mint tea, this was a heavily spiced cinnamon—I had to buy some, it was so delicious. Everything you want American chai to be.

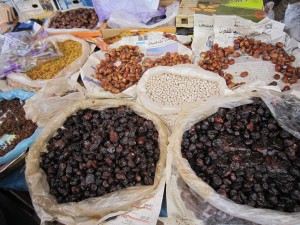
And I almost forgot all the fruit! Watermelon cut off the “tasting melon” at a souk and given to us for free with the toast “to your health.” Piles of dried dates and figs in every market you come across. Being forced to eat prickly pear after prickly pear from a cart before finally convincing the owner that we actually want to buy some to go. I may be lacking for fruit on campus, but there’s certainly tons to be found on the streets.

Dates, dates, dates

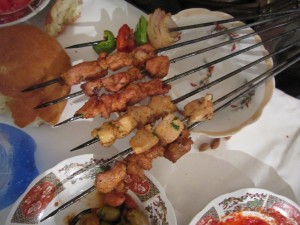
But on to the real food. We had dinner one night in Jma al Fna, the square in Marrakesh that turns into a crazy, smoke-filled riot of the senses at night. Food stalls crop up out of nowhere starting around five o’clock. Our group of ten sat down at one and I think just ordered everything on the menu… the food just kept coming, long after we had eaten our fill. It seemed pretty typical street

I'm going vegetarian when I get home...

food—lots of skewers of meat, though the spicy red sauce we requested was an excellent accompaniment, and one of the few actually spicy things I’ve encountered in Morocco. The price tag, however, was close to those at upscale restaurants outside Marrakesh, a sad sign that Jma al Fna is more a tourist than local attraction at this point. Cheap food does abound, however. At a souk in Azrou a couple days later I finally tried a merguez sausage sandwich for about a buck—though tasty, I found the flavor a little too distinctive for my taste. Distinctive of what, I could not tell you… perhaps too lamb-y, it just wasn’t my favorite. The brochette (kebab) at the same stall were extremely fatty, salty, and delicious, however. I’m going to have to stop here because I am off tomorrow morning on my next culinary adventure, to an oasis in the Sahara. Who knows what they eat out there! So you will have to hold on just a little longer for tales of opulent lunches that left us practically comatose.

Merguez sandwich in the perfect setting, a souk (photo by David Wong)

Eating in Morocco, Part 1

3 Jul

The aftermath at Dar Naji in Rabat

Somehow I blinked and I have been in Morocco for a little over a week already! I am studying abroad here for four weeks, and will hopefully be writing a few posts about the (so far delicious) food I encounter. My program is based at a university in a small town in the Atlas mountains. We have a generous meal plan, but unfortunately the food is pretty bad, which probably makes everything I taste outside the walls seem infinitely better. Thankfully, we have a lot of trips built into our schedule (and the program gives us a food budget for them!), so I have already been able to try quite a few Moroccan specialties.

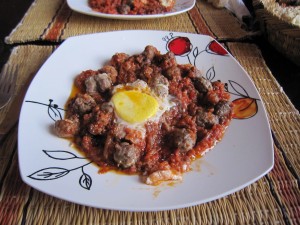
Kefta tagine

The first thing I wanted to try, of course, was a tagine– the ubiquitous stew-like dish named after the clay pot in which they are cooked. (I bought a tagine for about 2.50 yesterday, and am excited to try cooking with it, if it makes it back to the States in one piece!) One of the most common tagines is kefta, which is usually beef (I believe) meatballs in a tomato sauce, with an egg on top. Though delicious, this seemed pretty similar to something I could get back in the US to me, and I probably won’t order it too often if there’s something more interesting on the menu.
There definitely were lots of interesting things at the first proper restaurant I went to, Dar Naji in Rabat. We arrived in Rabat pretty late after a 3 hour bus ride, and our professor pretty much just ordered the entire menu for our group of ten. This was excellent for my food-reporting, as I got to try just about everything, and discovered what I will definitely order again.

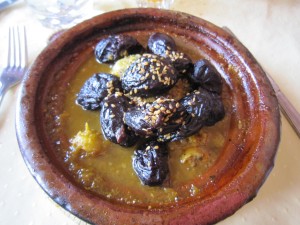
Beef and prune tagine

My favorite (which was also my request) was the tagine of beef aux pruneaux. I guess this would translate as “with prunes,” though I think English needs a better word to convey how the prunes become one with the beef and make it slightly sweet, while the prunes themselves took on savory flavors from the beef. (On a side note, I’ve found most menus so far to be in French, with no Arabic at all. Being the only one in the group who speaks French, this means I am quickly brushing up on my food vocabulary.)
Someone else in the group also noticed that brain tagine was on the menu, and requested that we order one to give it a shot. Not being one to pass up a new food experience, I tried it as well. The brain was in a tomato-y sauce, and I really didn’t think it had a strong flavor in itself. The texture reminded me of scrambled eggs– not at all off-putting, but I wouldn’t feel the need to order it again.
The other tagines included chicken with lemon, beef with vegetables, fish, and kefta. I loved the lemon sauce with the chicken, but found the meat itself a bit dry… I think my next tagine will have to be chicken so I can see if this is a common problem. The setting of Dar Naji was also beautiful… we were seated at a low table on the terrace, which had a canopy covering and overlooked the medina (old city) walls. And it was all reasonably priced, at about $5 per tagine.

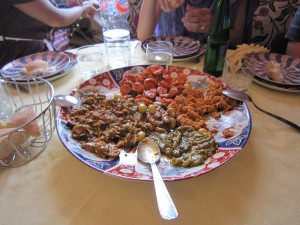
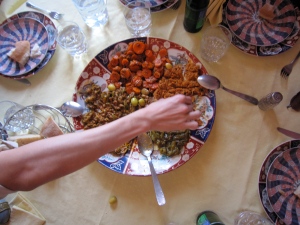
Beautiful vegetables...

The other memorable restaurant we visited was in Meknes, but I am a terrible reporter and failed to take down the name. This was also opulently decorated, with the walls lined with tons of cushions that we quickly sank on to, exhausted by the 107 degree heat outside. Our professor ordered us some mixed vegetables to start… although for once they came with serving spoons, everyone was so hungry that we did it the traditional Moroccan way, using bread to transport the food most efficiently from

...were quickly devoured

serving plate straight to mouth. The vegetable were all cooked in various spiced sauces, and served cold. The green marinated peppers were probably my favorite, though the carrots were also unexpectedly sweet and delicious.
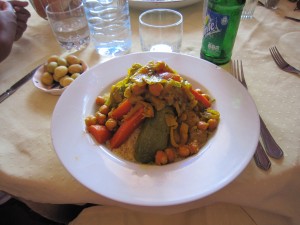
I ordered cous cous as a main course, which is another Moroccan specialty usually served on special occassions, and though it usually comes with meat I requested it be left off because I just didn’t feel the need for it. The resulting tower of cous cous covered in vegetables was excellent. The vegetables had some sort of sauce on it that tasted faintly buttery, but I couldn’t really pin down what was in it. But it seeped down into the cous cous and made a delicious dish that was perfect for lunch, not nearly as heavy as a tagine.
I have so much more I could say but I think I will leave it there in order to save some things for another post! Bislaama.

A mountain of cous cous, covered in veggies

Strawberries, Two Ways

18 Jun

Summer in a cake

While we’re on the theme of excellent dishes to bring to barbeques/potlucks, both of these fit the bill. I hope you’ve been checking out your local farmer’s market recently, and if you have you probably have lots and lots of strawberries (and not too much other fruit yet, unfortunately). The first dish, a strawberry-balsamic flatbread-y thing, is awesome because it allows you to use up those strawberries even if you don’t want to make a dessert! The dough was also so much fun to work with– really pillowy and soft, it was very easy to knead, so don’t be put off by that. I did end up thinking the bread was a little dry, however– I might reduce the baking time next time. I also don’t think the bread itself would suffer from adding a few more flavorings (though this could be because I forgot to add the salt till the last minute. D’oh). But even as is, this was a delicious addition to a potluck my friends and I had last week.

Foccacia/flatbread/delicious thing

The second dish is a super simple strawberry cake. Though it takes a little time to bake, it’s perfect if you want a dessert to use up a ton of berries and wow your friends (or yourself), without spending a long time messing with pie crusts or anything like that. My batter was a little thick and absolutely COVERED in berries, so I was a little unsure that it would rise up as shown in Deb’s pictures, but it turned out looking absolutely amazing. My one tip would be to layer up more on the edges than in the middle… the middle became basically a pool of strawberries on my cake, which was delicious but perhaps not optimal.
So hurry down to the farmer’s market (or, ok, the supermarket) and snap up some strawberries before the season’s over!

Cramming in as many strawberries as possible

Strawberry Balsamic Flatbread with Goat Cheese (Adapted from Joy the Baker)
Equipment: baking sheet
Ingredients:
5 teaspoons (about 2 packages) active dry yeast
1 cup warm water
3 cups of flour, divided into 1 cup increments
3 tablespoons olive oil, plus extra for drizzling
3 tablespoons sugar
1 1/4 teaspoon salt
zest 1 orange
1 cup thinly sliced strawberries (less than a pint)
coarse sea salt
1/2 cup goat cheese
balsamic vinegar
1 tablespoon fresh mint or basil

Method:

In a large bowl, sprinkle the yeast over the warm water.  Stir with a fork to dissolve and break up any clumps.  Add one cup of flour and blend together until smooth (can use the fork).  Cover with a tea towel and set in a warm place to rise for 1 hour. If your oven has a “proof” setting, and there is no warm place in your house, you can use this.

After the mixture has risen, remove the covering and stir in 3 tablespoons of olive oil, sugar, and orange zest.  Add one cup of flour and stir to blend.  Add the remaining cup of flour and salt and work together into a dough with a wooden spoon or your hands.

Place dough on a lightly floured surface and knead for 5 minutes.  If the dough is too sticky, add up to 1/3 cup more flour and knead.  Dough will be slightly sticky, and that’s alright.

Clean out the large bowl and coat with 1 teaspoon olive oil.  Place dough in the bowl, and flip it over so that it’s entirely coated in oil.  Cover and let rise in a warm place for 1 hour, or until doubled in size.

Punch the dough down and knead for just a minute, before pulling and stretching the dough into a 16×9-inch rectangle (a little smaller than a standard baking sheet). Place on a greased baking sheet and let rise, uncovered, for 30 minutes.

Place a rack in the center of the oven and preheat to 375 degrees F.

When dough has risen, use your fingers to make random indentations in the puffed dough.  Drizzle with olive oil (carefully, it is difficult to not have it all go in one place!).  Top with sliced strawberries, and sprinkle with coarse sea salt.  Bake bread for 30 to 35 minutes, until golden, crisp and baked through. As noted above, if you want it a little softer, perhaps bake for a little less time. If one side is browning faster than the other, rotate the pan once, halfway through baking.

Remove from the oven and allow to cool for 10 minutes.  Chop mint or basil and crumble goat cheese. Drizzle with balsamic vinegar, and then sprinkle with herbs and goat cheese. Slice into twelve pieces with pizza cutter. Serve immediately, it only really keeps for a day.

Simple Strawberry Cake (Adapted from Smitten Kitchen)
Equipment: Electric mixer (hand or stand), 9 or 10-inch springform or cake pan, or 10-inch pie pan

Ingredients:
1 1/2 cups all purpose flour (can substitute 3/4 cup for barley flour)
1 1/2 teaspoons baking powder
1/4 teaspoon table salt
1 cup plus 2 tablespoons granulated sugar
6 tablespoons unsalted butter, at room temperature
1 large egg
1/2 cup milk
1 teaspoon vanilla extract
1 pound (450 grams) strawberries

Method: Hull and halve the strawberries, set aside. Butter your 9 or 10-inch springform/cake pan, or 10-inch pie pan (or 9-inch deep-dish pie pan).
Preheat the oven to 350 F. In a small bowl, whisk together flour, salt, and baking powder. Set aside. In a larger bowl, beat butter and one cup sugar together with an electric mixer until pale and fluffy, about three minutes. Mix in egg, milk, and vanilla until just combined. Mixture may look slightly curdled, this is fine. Add dry mixture gradually, mixing until just smooth.
Pour (or spoon, in my case) into prepared pan. Spread mixture evenly, if needed, and arrange strawberries on top, cut side down, in as close to a single layer as you can get. (I had to overlap them a bit, and ended up using just shy of a pound because I felt there were enough on there.) Sprinkle remaining two tablespoons sugar over berries.
Bake cake for 10 minutes, then reduce oven temperature to 325 F and bake for another 50-75 (my time) minutes, until golden brown and a tester comes out free of wet batter. I found I was still getting some crumbs sticking to my tester after quite a long time, but eventually decided that was just due to the moistness of the cake. Let cool in pan on a rack, and serve. It should keep for two days, lightly covered, at room temperature.

First Attempt at Empanadas

1 Jun

Not the prettiest empanadas around

I think there are definitely some foods that are easier to cook if you grew up watching them being made in your kitchen. I may not have picked up the exact recipe for risotto from my mom, but I made a pretty good version on my first attempt because I knew what the technique was all about from watching her make it many times. Empanadas, however, had never been seen in our kitchen until a couple of weeks ago, when I decided to try making them. My parents noted that they are essentially Cornish pasties, a British staple, with a different dough… but that didn’t help much, as we’ve always bought Cornish pasties instead of making them. So I was on my own here, hoping the sauce was the right consistency and inexpertly rolling out discs of dough to inconsistent thicknesses. I’m sure they would have been prettier (and maybe tastier) if I had had years of experience watching and helping someone make them, but I think they turned out pretty delicious regardless, and hopefully I will just get better at it. Next time, I would probably chop the chicken finer and thicken the sauce even longer, as I felt I ended up with mainly big chunks of chicken in these, instead of all the other delicious things.

Making things round is hard

Empanadas, and especially these empanadas, are definitely not a quick dinner. The dough can be made ahead of time, and I would suggest making the filling well ahead of time, as well, so that you are not sitting around hoping it will hurry up and cool already. The original recipe from Smitten Kitchen/Gourmet made extra dough for the amount of filling. I went the opposite route and made more filling than dough (because I couldn’t be bothered thinking through too many conversions). I still came out with 12 empanadas, which left lots of leftovers after 3 of us ate them for dinner, and the filling was delicious on its own for lunch. I also accidentally had Mexican/fresh rather than Spanish/dried chorizo. It worked fine but required pre-cooking, which the Spanish would not.

The finished filling

Chicken, Chorizo and Olive Empanadas (Adapted from Smitten Kitchen)
Makes 12 empanadas, with leftover filling
Equipment: Baking sheet, preferably with silpat; large skillet with lid
Ingredients
Dough:
1 3/4 cup all-purpose flour
1/2 cup whole wheat flour
1 stick (1/2 cup, 8 tablespoons) unsalted butter, cold
1 large egg
1/3 cup ice water
1 tbsp distilled white vinegar

Filling:

About 2 pounds chicken. Whole legs (including thighs), or whole bone-in breasts, split.
1 tsp salt
1/4 tsp black pepper
4 1/2 tbsp extra-virgin olive oil
2 large onions
2 bay leaves
1 1/2 oz (1/3 cup chopped) dried Spanish chorizo, or 2-3 links fresh Mexican chorizo
1/2 tsp smoked Spanish paprika
1/4 cup chopped pitted green olives
1/2 cup dry white wine
1/2 cup reduced-sodium chicken broth
1 egg for egg wash

Make Dough: Up to six hours ahead of time, sift flour with salt into your largest bowl. Cut butter into 1/2 inch cubes, and work into flour with fingertips or pasty blender until it resembles coarse meal, with some (roughly pea-sized) lumps. Beat together egg, water, and vinegar in a small bowl. Add to flour mixture, mixing with fork until just incorporated, the mixture will look shaggy. If bowl is big enough, gather dough in bowl and knead gently once or twice with heal of your hand until it just comes together. If your bowl is not big enough, do this step on a lightly-floured surface. Form dough into a flat rectangle and wrap in plastic wrap. Chill 1-6 hours.

Make Filling: If using fresh chorizo, remove from casings and brown in large, heavy skillet over medium heat until some fat has rendered out. Drain fat and remove chorizo. Pat chicken dry and sprinkle with salt and pepper. Heat 2 tablespoons oil in the large, heavy skilled over moderately high heat until hot but not smoking, then brown chicken, turning over once, about 6 minutes total, and transfer to a plate. Halve onions lengthwise and then cut lengthwise into 1/4-inch-wide strips. Mince garlic cloves. Saute onions, garlic and bay leaves in fat remaining in skillet, stirring frequently, until onions are softened, 4-5 minutes.

Add chorizo and paprika and cook, stirring, 1 minute. Add olives, wine, and broth and bring to a boil, stirring and scraping up any brown bits. Return chicken to skillet along with any juices accumulated on plate, then reduce heat to moderately low and simmer chicken, covered, turning over once, until tender, 25 to 30 minutes total.

Transfer chicken to a clean plate. (Sauce in skillet should be the consistency of heavy cream; if it’s not, briskly simmer until slightly thickened, about 5 minutes.) (Gina’s note: no idea if my sauce was the right consistency, but it seemed pretty thin even after simmering for a few minutes.)When chicken is cool enough to handle, discard skin and bones and coarsely chop meat. Stir chicken into sauce and discard bay leaves. Season with salt and pepper, then cool filling, uncovered, about 30 minutes.

Form Empanadas: Put oven racks in upper and lower thirds of oven and preheat oven to 400°F. Divide first dough into 12 equal pieces and form each into a disk. Keeping remaining pieces covered, roll out 1 piece on a lightly floured surface with a lightly floured rolling pin into a 5-inch round (about 1/8 inch thick).

Spoon about 2 tablespoons filling onto center and fold dough in half, enclosing filling. Press edges together to seal, then crimp decoratively with your fingers or tines of a fork. Transfer empanada to a baking sheet, lined with a silicone mat or waxed paper. (Mine stuck fiercely to parchment paper.) Make eleven more in same manner.

Beat an egg with 1 tbsp of water. Lightly brush empanadas with some of egg wash and bake in upper and lower thirds of oven, switching position of sheets halfway through baking, until golden, about 25 minutes. Transfer empanadas to a rack to cool at least 5 minutes. Serve warm or at room temperature.


Delia’s Chocolate Bread and Butter Pudding

23 May

Finished chocolate bread pudding

We had a rare visit from some extended family members this weekend, and took the opportunity to celebrate Father Spice’s birthday a few days early with a big dinner. Unfortunately (for me, that is), he isn’t a huge fan of cake, or most sweets, so the dessert was the trickiest part of the menu to plan. We considered a classic British summer pudding, but currants are difficult to find at the best of times in America, and apparently impossible this early in the season. So we decided to go for the not-quite-seasonal, but certainly delicious, chocolate bread pudding.
This recipe is from Delia Smith, basically the British equivalent of Julia Child. Whenever we’re cooking a big dinner at home, someone immediately suggests consulting “Delia.” As this recipe indicates, her recipes might not always be the healthiest, but she never lets us down.

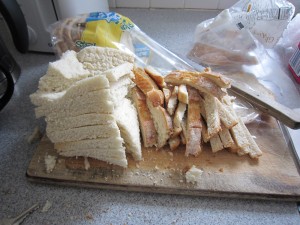
I won't tell if you munch on those crusts

A couple notes on the recipe: I roughly increased it to fit our oval baking dish, about 12 inches lengthwise. I used four eggs (up from Delia’s three), but some of them were quite small and I think it would have been fine with three. The booze flavor does come through quite strongly, so if you’re not using it I would definitely add something like a teaspoon of vanilla. And lastly, this is definitely a make-ahead dish (perfect for dinner parties), as you want a lot of time for the sauce to soak in to the bread.

First layer of bread down

Chocolate Bread and Butter Pudding
Serves 10
Equipment: Double boiler or saucepan with heatproof bowl, ovenproof dish preferably a bit smaller than 9×13
Ingredients:
1 loaf good-quality white sandwich bread, 1 day old
7 oz (200 g) Dark chocolate, 75% cocoa solids
2 1/2 cups (625 ml) heavy cream
6 tbsp dark rum or amaretto
3/4 cup (155 g) super-fine/caster or granulated sugar
1 stick (113 g) butter
Good pinch of cinnamon
3 extra-large eggs
To serve: Chilled heavy cream
Method: Lightly butter your ovenproof dish. Remove the crusts from your slices of bread, and cut each slice into four triangles. Set aside. Place the chocolate, whipping cream, rum, sugar, butter and cinnamon in a double boiler or a bowl tightly fit over a pan of simmering water. Make sure the bowl is not touching the water. Heat, stirring occasionally, until the butter and chocolate have melted and the sugar is dissolved. The mixture will not be homogenous. Remove the bowl from the head and stir well to amalgamate the ingredients better (the chocolate will probably have sunk to the bottom).
In a separate bowl, whisk the eggs. (I poured a little bit of the chocolate mixture into the eggs to temper them because I was worried the next step would cook them, but Delia doesn’t find this necessary.) Pour the chocolate mixture into the eggs and whisk very thoroughly to blend them together.
Pour about a 1/2 inch layer of the chocolate mixture into the base of the dish, and arrange half of the bread over the chocolate in overlapping rows. Next, pour half of the remaining chocolate all over the bread is evenly as possible. Arrange another layer of the bread triangles over the first. You may not use up all the bread. Finish by pouring the rest of the chocolate evenly over the top layer, and then gently press down the bread with a fork so that it is evenly covered in chocolate.

Ready to absorb all that chocolate-y goodness

Cover the dish with clingfilm and allow to cool at room temperature for about 2 hours, then transfer for the fridge to continue soaking for anywhere from 24 to 48 hours (longer is better).
When ready to cook, pre-heat the oven to 350F (180C). Remove the clingfilm and bake on a high shelf for 30-35 minutes. It is done when the top is slightly crunchy, but the inside should still be soft and squidgey. Let cool for ten minutes before serving with cold heavy cream.

Rhubarb-Onion Compote plus Top Chef tour

18 May

Rhubarb compote, pork chop, and roast veggies. Yum.

I am a huge rhubarb fan, and have been craving some delicious rhubarb baked goods since the season started. But last night we were having pork chops for dinner, and I thought I’d pick up some rhubarb to try it out in a savory dish. We often make an apple-onion compote to go with pork chops, so I thought I’d sub in rhubarb for the apple and see how it turned out. I was pretty pleased with the results, though it hasn’t quite satisfied my craving for strawberry-rhubarb pie.

Rhubarb-Onion Compote
Equipment: Heavy-bottomed saucepan, knife, wooden spoon
Ingredients:
1/2 tbsp butter
1 medium-sized onion
About 7 stalks rhubarb
2 tbsp balsamic vinegar
2 tbsp sugar, or to taste (I used turbinado/raw sugar)
1 tsp ground ginger
Method: Roughly dice onions. Discard ends of rhubarb and chop into half-inch pieces. Melt butter in heavy-bottomed saucepan over medium-low heat. Add onions and cook over low heat until they are starting to soften, a few minutes. Add rhubarb, balsamic, and about a tablespoon of sugar, and ginger. Turn heat to low, and simmer for about fifteen minutes, stirring occasionally and making sure the bottom isn’t burning. Add a splash of water if things are starting to look dry, but rhubarb has a lot of water in it. Taste after fifteen minutes. If it is too tart, add more sugar. Rhubarb is quite tart, but the onion provides some sweetness as it cooks. It is done when the onion has lost all of its crunch. Serve over grilled pork chops.

In other food-related news, the Top Chef tour stopped at the Stew Leonard’s near us today, so I went to check it out. The basic idea of this tour is that they have two previous contestants, who come up and have fifteen minutes to make a dish using certain ingredients (they were given some time to prep beforehand, so this wasn’t exactly like the high-stress quickfires on the show). Then judges decide which chef wins. There were two judges from Foodspotting already there, but they picked one from the audience as well. Thanks to my Top Chef trivia knowledge, I got picked! The two chefs were Ash and Angelo, and the food was delicious. Angelo, of course, went all Asian-inspired with a mock kimchi and a spicy chocolate sauce on his beef (the sauce was incredible, but kind of overpowered everything else). Ash made a very fresh herby salad, with an amazing aioli that he made in front of us. We went with Ash as the winner, though I might try out that sauce of Angelo’s when the recipe goes up online. It was fun being able to chat to the chefs and eat the food that I’m always craving when I watch the show… definitely check out if the tour is stopping by near you!

Here are some pictures from the day:

Angelo's dish, a bit more Top Chef-y

Ash's winning dish

Ash makes his aioli

Angelo doing some blending action

Restaurant Review: Cafe Dupont

5 May

Mmm, meat. Steak tartare at Cafe Dupont

Our Easter weekend full of delicious home-cooked food in Virginia was finished off by an excellent meal back in DC: dinner at Cafe Dupont. Mother Spice was staying in the attached Hotel Dupont for the night, and we decided to keep it simple and have dinner downstairs.
Roxie had been to the bar (Bar Dupont. Are you catching on to the naming scheme?) before for their happy hours, 4-6 every night, when their usually $11 cocktails are half price. Of course, the opportunity for these cocktails was not passed up at dinner. Roxie and her roommate Lily are partial to the Alan’s Love, and Mother Spice enjoyed the Dupont Imperial.

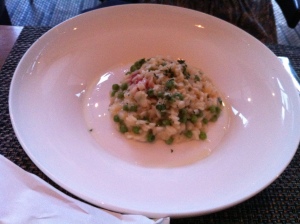
Fresh pea risotto

Choosing what to eat proved to be much more difficult than choosing cocktails, however, as none of us was starving but pretty much everything on the menu looked tempting. We eventually decided to split appetizers– Lily and Mom shared a pea risotto that looked excellent, while Roxie and I decided the time had finally come to try steak tartare. I enjoyed it very much– it was excellently spiced with a velvety texture, though the steak flavor was very subtle.

Heaven(ly scallops) on a plate

For mains, Roxie and Mom both got the mussels with saffron– huge buckets of mussels, with accompanying french fries. While the mussels were delicious, to me, the letdown of the night were the fries. Not quite chunky fries and not quite the thin, crispy variety, they weren’t excellent but that didn’t stop me from stealing many. Lily got the appetizer crab cake as her main, which she polished off sharply. And though I was tempted by the steak frites (and well, everything) I ended up getting seared scallops on a bed of lemon risotto, with asparagus and a ramp pesto. Words cannot express how much I loved this dish– seasonal, with three huge scallops perfectly seared and complemented by the creamy risotto underneath. I also appreciated the modest portioning (well, except for the amount of mussels)– I am always a bit put off by restaurants that give you enough for two people.
Nonetheless, we were too full for dessert. An incentive, perhaps, to return again, although I didn’t really need one.

Farmer’s Market Bounty: Simple Asparagus Dishes

16 Apr

Sweet potato fries and asparagus

I got a little over-excited at the farmer’s market last weekend. I’m just so excited that we are finally seeing a couple new vegetables after a very long winter, that I had to buy a ton even though I knew I already had a lot of food in the house. I’ve been most excited about seeing asparagus everywhere (though as soon as the rhubarb comes in I’m sure I’ll be buying that up by the truckload), but I’d gotten bored of steaming it so I decided to do a couple other, equally simple, dishes with it this week.
The first was my justification for buying a pint of fingerling sweet potatoes, purely because they were adorable. I figured they would be perfect for baked sweet potato fries– hardly any cutting to do! And since roasted asparagus is delicious, I plonked some asparagus on to the pan for the last ten minutes of baking. Perhaps not a complete meal, but a delicious one.

Fingerling sweet potatoes from farmer's market versus massive sweet potato from Whole Foods

The next night I realized I still had a ton of asparagus, and my swiss chard was quickly looking very sad indeed. So I sauteed up the vegetables, added some lemon and spaghetti, and made a delicious pasta. Hooray for spring!
Baked Sweet Potato Fries and Asparagus
Equipment:
Baking sheet, sharp knife
Ingredients:
As many sweet potatoes as you want
As much asparagus as you want
About 1 tbsp olive oil
Salt, pepper, chili powder, and cinnamon, to taste
Method: Preheat the oven to 450F. Peel the sweet potatoes if you want, but I don’t find it necessary. Cut the sweet potatoes into some sort of fry-shape (with the fingerlings, I just quartered them lengthwise). Toss in olive oil, and sprinkle over any seasonings you want (I used those listed above). Spread out into a single layer on the baking sheet, and put in the oven for about 15 minutes. While baking, break off the tough ends of the asparagus, and toss in bowl you tossed the sweet potatoes in, adding more oil if you want.
After 15 minutes, the sweet potatoes should be fairly tender. Stir them around a bit, and throw the asparagus on top, trying to spread it out evenly again but don’t worry if it doesn’t fit in one layer. Put back in the oven for about 10 minutes, at which point the asparagus should be done, and the sweet potatoes crispy in places. Devour in one sitting.

So many good things in one pan

Spaghetti with Swiss Chard and Asparagus
Equipment: Pot, frying pan, knife
Ingredients:
One bunch swiss chard (it will shrink a lot)
Half a bunch asparagus (or more)
Spaghetti
1 tbsp olive oil
2 cloves garlic
Juice 1/2 lemon
1 tbsp butter
Salt and pepper
Method: Put a large pot of salted water on to boil. While waiting to boil, roughly chop the swiss chard. Break off the tough ends of the asparagus (if you bend the stalk, it will naturally snap where it is tough). Discard or save for another use (such as in broth). Cut the stalks and heads into roughly one-inch pieces. Peel the cloves of garlic, and smash with the broad side of a knife. When water boils, add enough spaghetti for about two people. While it is cooking, heat olive oil in frying pan over medium heat. Put garlic in oil, and cook until it softens at edges, about a minute. Add asparagus and swiss chard. Season with salt and pepper and saute, stirring occasionally, until swiss chard is wilted and asparagus is cooked, but with some bite, about 6 minutes. Remove from heat if it is done before spaghetti.
When it is cooked al dente, drain spaghetti and toss into frying pan along with 1 tbsp butter and juice of half a lemon. Return pan to heat, and toss with vegetables until butter is melted. Taste, and add more lemon juice or seasonings if desired. Eat immediately. Serves two.